DIY Craft : Fabric Key Chain Holder

Day 9, Hub # 9
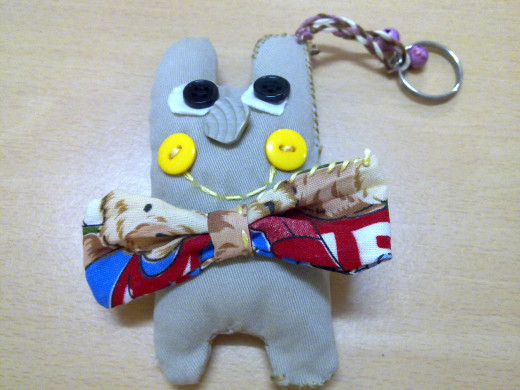
At the rate 1-10, how do you rate this key chain holder?
Handmade gift is in fact becoming a trend since most people are trying to save money, reusing and recycling all the different materials that we could find at home. Making handmade gifts at home is an exciting way to gather your friends or family members to join in the fun activity.
It doesn’t really matter if the first time result isn’t as beautiful or cute as you had expected because with practice, patience and after you had realized the mistake that you had created, your handmade gift will turn out beautiful during the second time.
This article is about the “Alphabet Fabric Keychain Holder” which I had recently sewn. It is the perfect handmade gift for your friends, family members and relatives for all occasion.

Wonderful Fact about Keychain Holder
The wonderful fact about this keychain holder is you are making the alphabet of the person’s Christian name which is especially for him or her. I had self-made a fabric keychain for my niece’s birthday. Kids love to loop keychain with their house keys, schoolbags or handbags. The keychain is a letter “H” alphabet which was her Christian name.
You can choose to use pattern or other colorful fabric that you like and if you could buy those “eye buttons”, they are much convenient as you just have to glue the “eyes” onto the fabric rather than sewing the “eyes”.
Anyway, after I had sewn the keychain, I realized that I had made a blunder; one of the “H” legs was shorter, looked like a handicapped cartoon character! Hence, remember to leave more space of fabric before closing the gap with the last sewing.
Let’s get to the step-by-step instructions on how to sew this cute keychain holder. Happy sewing !


Materials You Need to Prepare:
- Colorful threads
- a pair of Scissors
- a needle
- some cotton
- a bottle of glue
- a keychain ring
- white card or paper
- marker pen
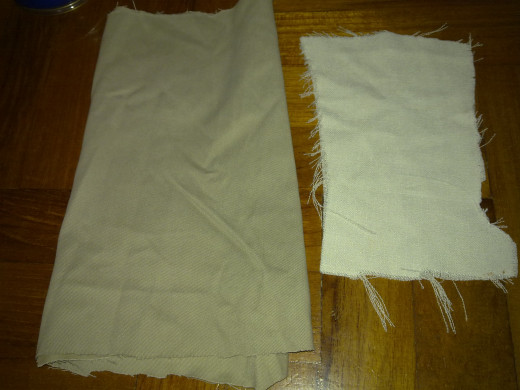
- a piece of white cloth ( small )- for the eyes
- a piece of brown cloth ( 8 inch x 6 inch )-for the body
- 2 yellow buttons-for the cheeks and 1 brown button - for the nose
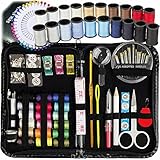
Buy Full Set Sewing Kit
Step 1

How to draw the letter "H"
Draw a capital letter "H" on the white card with a marker pen. You can draw whatever alphabet that you like as long as it could fits with two eyes, one nose and a mouth.
Now draw 2 eyes, a circle nose, 2 round cheeks, dotted smiling mouth and a bow tie. This white card is a sample of keychain design you need to follow later on.
Cut out the letter "H" sample.
Step 2


Cut the cloth
Turn the brown cloth inside portion towards you. The front side will be facing down on the table.
Fold the brown cloth into half.
Place the "H" sample on top of the brown cloth.
Use a marker to trace out the "H" sample. Just draw the side lines of the letter "H" with a marker pen. You needn't have to draw the face on the cloth. Remove the “H” sample card.
With a sewing needle and thread, sew a temporary stitch along the sidelines of the letter "H" brown cloth.
Use a pair of scissors to cut both brown cloths, along the sidelines of letter "H". Remember to leave a little space in between the lines as you need to sew the stitch later.
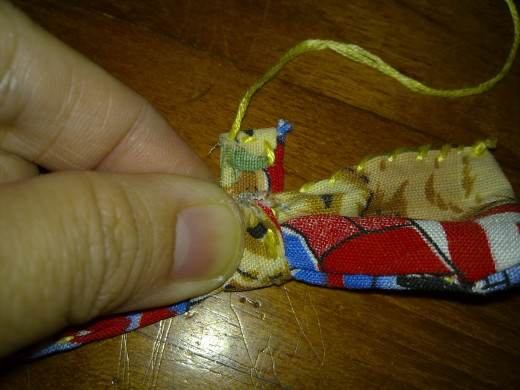
Step 3


How to sew the letter "H" keychain
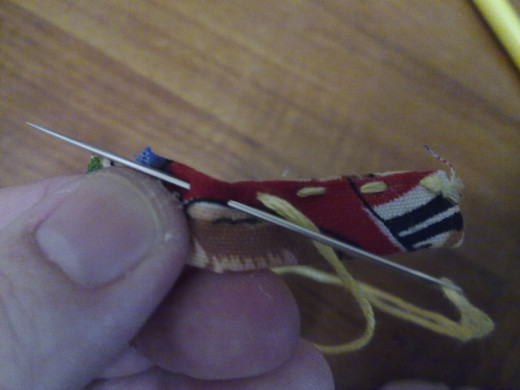
Insert 1 strand of thread through the needle eye and tie both ends together to form 2 strands of threads. This is the permanent stitch.
Sew along the sidelines of the "H" on the brown cloth. Leave a small gap at one of the ends in order to insert the cotton. Ensure that the gap is sufficient for your finger to push in the cotton. You will sew up the small gap later on.
Sew another set of stitch along the same sidelines. This time sew up the empty spaces from the first stitch. The purpose to sew the stitches twice is to ensure that the cotton does not come out in between the holes.
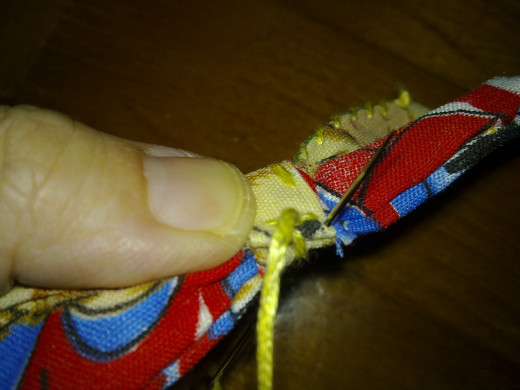
Tie a knot and cut off the threads. Next, trim the excess brown cloth, near the base of the "H" sidelines. Don't trim too close to the stitches. Otherwise the stitches will come off.
Remove all the temporary threads that you sew earlier.
Step 4


Time to insert the cotton
Turn the inside brown cloth outside through the small gap that you had left opened.
Push in a little cotton into the gap. Don't push too much cotton into the "H" keychain as it will be difficult to sew the gap later on. Just push in sufficient cotton to make the "H" keychain looks a little fluffy not plump as a balloon.
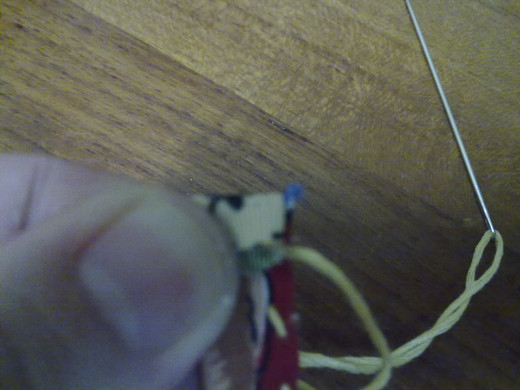
Sew up the gap with 2 strands of threads. Sew it twice so that the cotton doesn't come out. Now your “H” keychain is done.
Step 5


How to make the white eyeballs
Draw 2 circles approximately 1 inch diameter on the white cloth. Cut out 2 circles for the 2 white eye balls.
Apply a little glue at the back of each white circle cloths and paste them on the "H"keychain.
Follow the location of the eyes that you had drawn on the white card earlier on.
Allow the glue to dry on the "H" keychain.
How to sew the black eyes
Place a black button on top of the white eye. Sew it a few times to make sure that the button does not come off easily.
Repeat the same procedure for the other black button on the other eye.
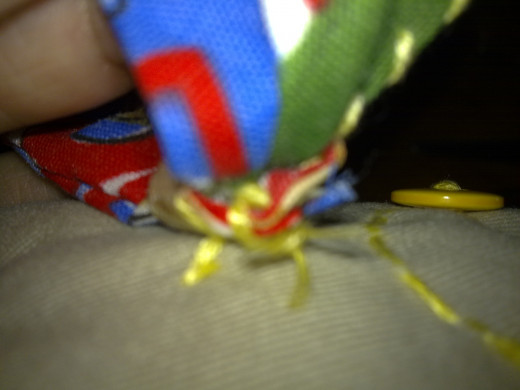
Step 6


How to Sew the nose button
Take a brown button and sew it on to the “H” keychain. Follow the location of the nose that you had drawn on the “H” sample card earlier on.
How to sew the Cheeks
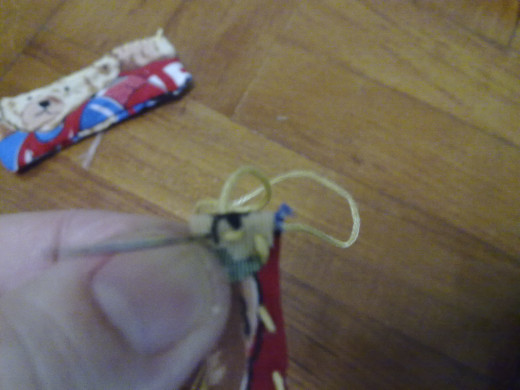
Use yellow thread to sew one yellow button on the left cheek and another on the right cheek. Do not cut off the thread yet.
How to sew the Mouth
Use a yellow marker to draw the smiling mouth.
Remember the excess yellow thread that has been left behind? Yes, continue to sew the smiling mouth from your left hand side to the right.
The sewing pattern looks like the photo shown, ham and space.
After you have sewn the last ham, swing the thread in a circle around the yellow button, put the needle through the circle and pull up to tie a knot under the button.
Cut off the excess thread.
Step 7


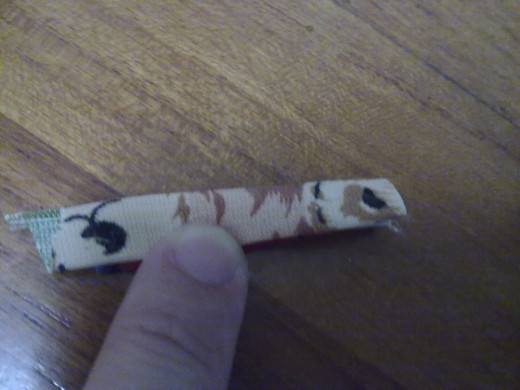
Bow tie
Turn the inside pattern design cloth towards you and fold it into half.
Use 2 strands of yellow thread to sew along the sides.
Remember to leave a small gap.
Now, through the gap, use your finger or a pencil to turn the bow tie inside out.
Sew up the gap.
Here, you can see a rectangle shape bow tie.
Step 8
 into half")


How to make a bow tie.
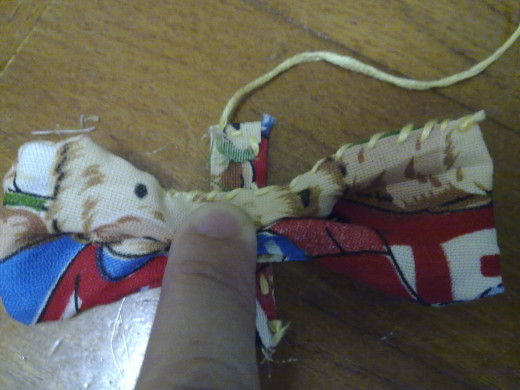
Now, take a small piece of rectangle cloth.
Fold in the right hand side and the left hand side too, as photo shown.
Fold it into half again.
Sew up the opening and the side opening of both side ( see photo shown ).
Do not cut off the thread yet.
Use your finger to press down the middle part of the bow tie.
Sew the small piece of rectangle cloth in the middle to tie the middle bow tightly, so that the sides will be expanding out like a butterfly wing.
Place the bow tie under the smiling mouth and sew it into the “H” keychain.
Step 9


Type 2


How to sew the keychain
There are 2 options for you to choose which type of keychain you want it to be.
Type 1 - Key ring
This is the simplest method.
Use DMC thread which comes in 6 floss per strand ( thick enough to hold the key ring onto the “H” keychain) to sew the key ring at the top end “H”keychain.
You can choose either the left hand side or the right hand side.
It depends which you prefer.
Type 2- Braided thread with key ring
Cut out 3 different colors of thread ( I used DMC threads which comes in 6 thin floss per strand)
Double the length of the “H” keychain.
Fold each thread into half.
Put them together and tie a knot at the crease folded part ( the middle part which the thread are folded)
Do you prefer to give handmade or store bought gifts? Why?
Step 10


How to Sew the braid
After you have tie a braid , remember to leave at least 4-5inch space for sewing purpose.
Sew each of the thread into the right / left side of the “H” top end.
On the other end, loop braided threads through the key ring.
Join both ends together and tie a knot.
Cut off excess threads.
You can add in small “jingle” bells to the keychain to make it special.
Other Handmade Gifts That You May Like To Try
- Father's Day Present ( Gift )- Handmade Bookmark
I love handmade gifts. Making them are easy especially when you use all the left over materials in hand. Recycle the papers, wrappers and old buttons are the best method. This handmade bookmark requires ribbon, color papers and markers. I am sure you - Easy Valentine's Day Gifts to Make
Scratching your head what to buy for Valentine's Day? Don't buy. Keep your money in your pocket instead. Make beautiful, simple handmade gifts for your special someone. Follow these easy to make Valentine's Day gifts. - Handmade Gift: Cute Heart Pouch
A great gift for birthdays, Christmas, Valentine's Day,Mother's day and even Women's Day. - CHEAP CHRISTMAS GIFT IDEAS
Great ideas of low budget and cheap Christmas gifts for friends and family. Order online for fast delivery. - Special Gift Idea: How to fold Mini Paper Hearts
Don't know what to buy for your special person on her birthday, Christmas Day, Valentine's Day? Why not make something special for instead of wasting money, time and energy window shopping all day. This project is easy for all ages, even kids know ho - RECYCLING CRAFTS for KIDS
Earth day is a day where kids and adults celebrate this day with many activities to help to save our planet Earth and to create awareness about our damaged environment due to men greed.Although we couldn't help in a big way, we could reuse, recycle a - Unique Gifts: How to make Easy Paper Rose Flower
Make this year Mother's Day a special day by making your own handmade gifts for your mom. Handmade Paper Rose Flower is easy and can last all year. It is inexpensive and lovely too.
© 2012 peachy


