Easy Rice Cooker Cake Recipe: Cherry Coconut Cake

Day 17, HUB # 17


How well did you like this cake recipe?

In our country, most people use desiccated coconut in Malay sweet cakes and tasty coconut tarts but not in cakes or muffins.
I have been to several well-known bakery shops but couldn't find any cakes with coconut fillings at all. I searched high and low for this particular cake because it is my niece’s birthday. She loves desiccated coconuts very much.
Disappointed, I search through the internet and stumbled upon many desiccated coconut cake recipes which applied the ingredient on the surface of the cake rather than inside the cake. Had to continue my search elsewhere...
The Cookbook I Bought!

I found "Cherry Coconut Cake" Recipe
Hence, I set forth to the Popular Bookstore, which is the only book shop that supplied all range of books, to hunt for the coconut cake recipe.
Frankly speaking, it was easy to look for this particular recipe when there are so many recipe books scattered around the book shelves. Many people are inconsiderate. After they had browsed the recipe books, they simply “chucked” the books anywhere which is convenient to them, instead of returning them to the original location.
Anyway, I was delighted to have found “Cherry Coconut Cake” recipe in the Complete Step-by-Step Cookbook which has more than 800 recipes to choose from. It was sold at a very low price of RM 19.90 ! A great bargain for such a BIG RECIPE BOOK!
Without any hesitation, I bought this book and I knew I had to make this coconut cake because it requires desiccated coconut INSIDE the cake.
A bad review is like baking a cake with all the best ingredients and having someone sit on it.
— Danielle Steel
SR Flour Substitute
I did encountered some problems during the baking session as I did not have any SR flour (Self-raising flour) in hand.
Therefore, I substituted the SR flour with 220g plain flour and 2 1/2 teaspoon of baking powder and sieve them together in a bowl.
The second problem was the Cherry Coconut cake took me 1hour and 50min to bake instead of the regular 45 min ! This is due to the thick and sticky batter which required more baking time.

Tips to Take Note
Luckily for me, I used my regular Panasonic Rice Cooker to bake this cake. Otherwise, I would be busy keeping watch for the cake situation if it is was baked in an oven!
I find that baking cake in rice cooker is very easy and convenient as I don’t have to keep watching after the cake, whether it is burnt or did the cake sink in the middle part, the usual mishaps that happened in baking session for many people.
Tips:
Do not grease too much butter around the inside rice cooker pot because the cake will turn out very oily.
Just lightly dip your finger into the butter, grease the butter all around the inside pot. Trust me, it is sufficient.
Value For Money Rice Cooker


The benefits of baking a cake in a rice cooker pot
- Firstly, you don’t have to pre-heat your rice cooker as you need to do so if you are using an oven.
- Secondly, you don’t have to use any baking sheet in the rice cooker pot. The cake will not stick to the pot because the pot is not made from aluminium. Therefore, you get to save some money and save the trouble from cutting the baking sheet circle shape.
- Thirdly, baking a cake in a rice cooker pot definitely makes your cake comes out soft and fluffy, cooked inner texture, well risen cake surface and no burnt at the sides of the cake.
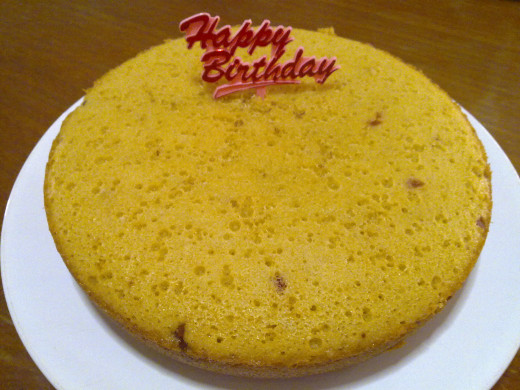
I love the brownish color at the bottom of the cake. It has crispy exterior, soft and chewy interior texture, the taste which resembles Coconut Candy Sweet Cakes.
It doesn't matter what brand you are using as long your rice cooker pot has the function button which cooks / bakes 45-50min. I used the “White Rice” button because it cooks for 50min.
The longer it bakes , the cake texture becomes fine, moist and not wet or sticky at all.
Ingredients Photos
Click thumbnail to view full-size


Baking Time
Baking Ingredients to Prepare
- 225g butter, softened
- 225g (actual weight ) castor sugar
- 4 eggs
- 225g SR flour, sifted
- 55g desiccated coconut
- 80g red cherries, diced


Step-by-Step Instructions
- Make sure that the rice cooker pot is dry and lightly greased with butter. Do not put too much because your cake will turn out oily.
- In a big bowl, beat butter and sugar until light and fluffy. I reduced the sugar to 180g.
- Beat in one egg at a time. After you have beaten in the first egg, stir it together with the butter mixture. Then beat in the second egg and so forth.
- In another bowl, sift the SR flour. Fold in the flour into the creamy mixture. Stir again.
- Add in the desiccated coconut and stir until the batter is well combined. You may find the batter a little sticky and difficult to stir because it is thick and sticky. Just stir for a couple of minutes will do.
- Lastly, add in the diced cherries and give a last stir until all mixed well.
- Spoon the batter into the prepared rice cooker pot. Use the back of a spoon to level the batter surface even and make sure there are not any holes or bubbles in the batter.
- If you are using Panasonic Rice Cooker, choose “White Rice” and press “Start” to start baking your coconut cake, which takes approximately 50min.
- When it is done, the light will jump into the “Keep Warm” button.
- Insert a skewer or a toothpick into the center of the cake. If it comes out clean, that means your cake is ready.
- If it comes out wet and sticky or still appears wet surface, press the “White Rice” and “Start” again. Bake for another 50min.
- Do not worry, your cake will not burn. This is the advantage of baking with a rice cooker.


How to Remove Cake from the Rice Cooker
- When the cake is ready to be consume, prepare a big flat round plate or wire rack.
- Use a plastic knife to loosen the cake with by inserting the knife around the cake.
- Do not use a stainless steel knife because you may scratch the sides of the rice cooker pot.
- Overturn the rice cooker pot onto the plate or rack. Give a few shake.
- You may notice that the cake comes out easily and clean, with no crumbles at all.
- Now, you are looking at the bottom side of the cake.
- Use another flat plate to cover the bottom .
- Use both hands to hold tightly onto both plates and overturn the cake again.
- Remove the top plate.
- This time, you are looking at the front cake.
- Leave it to cool for 10-20min before cutting the cake.
How to keep the cake?
If you could not finish the coconut cake in a single day, cut into several slices and keep them in Tupperware or plastic containers. However, make sure that the cake is not hot at all. Otherwise, the containers will be “perspiring” inside!
| Nutrition Facts | |
|---|---|
| Serving size: 6 people | |
| Calories | 318 |
| Calories from Fat | 414 |
| % Daily Value * | |
| Fat 46 g | 71% |
| Sugar 78 g | |
| Fiber 10 g | 40% |
| Protein 6 g | 12% |
| Cholesterol 62 mg | 21% |
| * The Percent Daily Values are based on a 2,000 calorie diet, so your values may change depending on your calorie needs. The values here may not be 100% accurate because the recipes have not been professionally evaluated nor have they been evaluated by the U.S. FDA. | |
More Cake Recipes
- Chocolate Chip Raisin Muffins Recipe
Muffins are great for anytime. Bring some muffins to work for teabreak or your kids could bring some to school for light meals. - Carrot Scones
Carrot scones are healthy, low in cholesterol and fats. Suitable for breakfast and teatime. - Pumpkin Walnut Cake for Halloween
Pumpkin Walnut Cake is moist, a little sticky, full of pumpkin flavor and sweet pumpkin bits with red cherries are great combination for natural sweetness. This cake recipe calls for less sugar. less butter and less eggs. Hence, it is nutritious! Gre
This content reflects the personal opinions of the author. It is accurate and true to the best of the author’s knowledge and should not be substituted for impartial fact or advice in legal, political, or personal matters.
© 2012 peachy


